How to Upload Bodyshot Headshot Photo Meeting Hiring Website Requirements
Constructive images bring your website to life and heighten your written content. Using loftier-quality and correctly sized images of faculty, staff and administration is especially important, since photos put names to faces and welcome visitors to your site. Utilise these guidelines to take and resize photos to the correct dimensions before yous upload them to your Drupal website.
For further guidance on your headshot or other website troubleshooting, email ccasweb@gwu.edu.
Tips for Taking Headshots
Larn how to take a high-quality, professional headshot at dwelling with a smartphone or digital photographic camera. For further guidance on your headshot or other website troubleshooting, electronic mail ccasweb@gwu.edu.
Pace 1: Choose a Background
- Choose a non-distracting background, such equally a manifestly wall, uncluttered bookshelves or outdoors, with every bit few people in the background as possible.
- Stand at least six anxiety away from the background to avert the "passport photo" look.
Step two: Check the Lighting
- Choose a location with ample lighting, but do not stand up directly under a vivid calorie-free.
- Natural lite is ideal, whether you are outdoors or in a well-lit room with large windows.
- If outside, try to stand in the shade. Ideally, you desire to be neither backlit by the dominicus nor standing under direct sunlight. Avoid facing the sun.
Step iii: Set the Camera
- If possible, have someone else have your headshot.
- If another person cannot take your headshot, switch your phone photographic camera to front-facing (selfie camera), then gear up information technology up on a tripod or lean information technology confronting a perpendicular surface (east.g., a stack of books, a wall, etc). For digital cameras, only set up on a tripod or stack of books and frame your shot through the viewfinder before returning to your spot.
Step 4: Shoot
- Cell phones have wide-angle lenses generally, so if using a phone, frame your shot and take a step closer. Zooming in on a smartphone reduces the quality of the paradigm.
- Go on your horizon line level.
- Remember nearly the space surrounding your subject, such as the amount of floor or ceiling showing. Negative space should residuum the residual of your composition.
- Avoid using wink, every bit it can crusade red eye and unnatural lighting.
- Set your headshot for success and you lot should not demand to brand additional edits!
Footstep 6: Save and Share
- Keep a version of your photo in its original, full size. It may need to be cropped to dissimilar sizes depending on the context, so keeping a loftier-res version is ever your best bet.
- Send your headshot to your Drupal website manager so they tin update the website for you lot. Non sure who that person is? Electronic mail ccasweb@gwu.edu.

Bad Headshot Example
This is an instance of a poorly taken headshot
- Photo is taken as a selfie
- Face is not well-lit
- Camera is zoomed in resulting in a low-resolution photo being taken

Good Headshot Example
This headshot uses headshot all-time practices:
- Head and torso are properly framed in the headshot
- Face is well-lit with a low-cal source
- Photograph is in high resolutions and properly sized
Drupal Photo Dimensions
Whatsoever image uploaded to a Columbian Higher Drupal website should see quality and size requirements. CCAS websites employ standard horizontal and vertical dimensions to maintain a uniform look across all sites and keep the Drupal Editorial theme templates looking their best. Before uploading photos to your site, information technology is of import that yous resize them to the exact dimensions listed in this section.


720×1080 px
For headshots on private Person pages

1080×720 px
For all other images, such equally main images, and promos
Tips for Photo Resizing
The CCAS Function of Marketing and Communications recommends Adobe Photoshop and Canva for photograph editing and resizing.
Adobe Photoshop
- Free download for students, faculty and staff at GW, but requires prior preparation to utilise correctly.
- If yous are comfy with Photoshop, feel free to utilise the platform. Make certain your image is not stretched, squeezed or otherwise distorted while resizing.
- When exporting your image from Photoshop, make sure you set your file type as "JPG" and calibration the quality down to 8 to ensure the image does non exceed 1 MB.
Canva
- Costless web-based platform
- If you are not comfortable using Photoshop, Canva is a uncomplicated way to resize your photos with little training.
- Follow the footstep-by-step instructions for navigating paradigm resizing in Canva.
Resizing Photos with Canva
-
Footstep one: Fix
-
Step 2: Create
-
Step 3: Resize
-
Step 4: Export
Prepare your images.
- Make sure the images you're resizing have the highest possible resolutions you tin find. Ideally, your pre-sized image should be larger than 1080 pixels broad past 720 pixels tall.
- Save all the images in a binder on your estimator. Brand sure you lot call up the location of this folder before opening Canva.
Register and sign in to Canva.
- Go to the Canva website. On the top correct-paw corner of the screen, click "Sign up."
- Yous volition have the selection to sign up with either your Google business relationship, Facebook business relationship or some other email account. Select an choice.
- If you choose to sign upwardly with a Google or Facebook account, y'all volition be asked to sign into your account.
- If you sign upwards with an email accost, you will exist asked to enter your name and select a password.
- Once yous're successfully signed up, you will be automatically logged in to Canva. If you sign out of your account, you can log back in using the "Log in" push at the tiptop right corner, next to the "Sign upward" button.
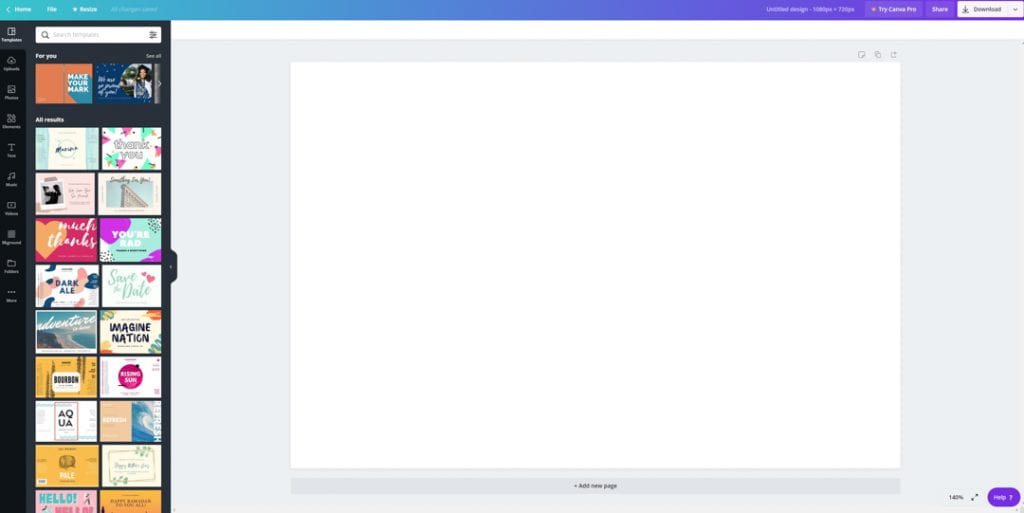
- From the Canva homepage, click "Create a blueprint" on the peak right-hand corner of your screen, then select "Use custom dimension." On the popup panel, type your horizontal and vertical dimensions respectively (for case, 1080 and 720), then click "Create new design."

- A white canvas will appear on the right side of your screen. This is the main area where you will resize your image.
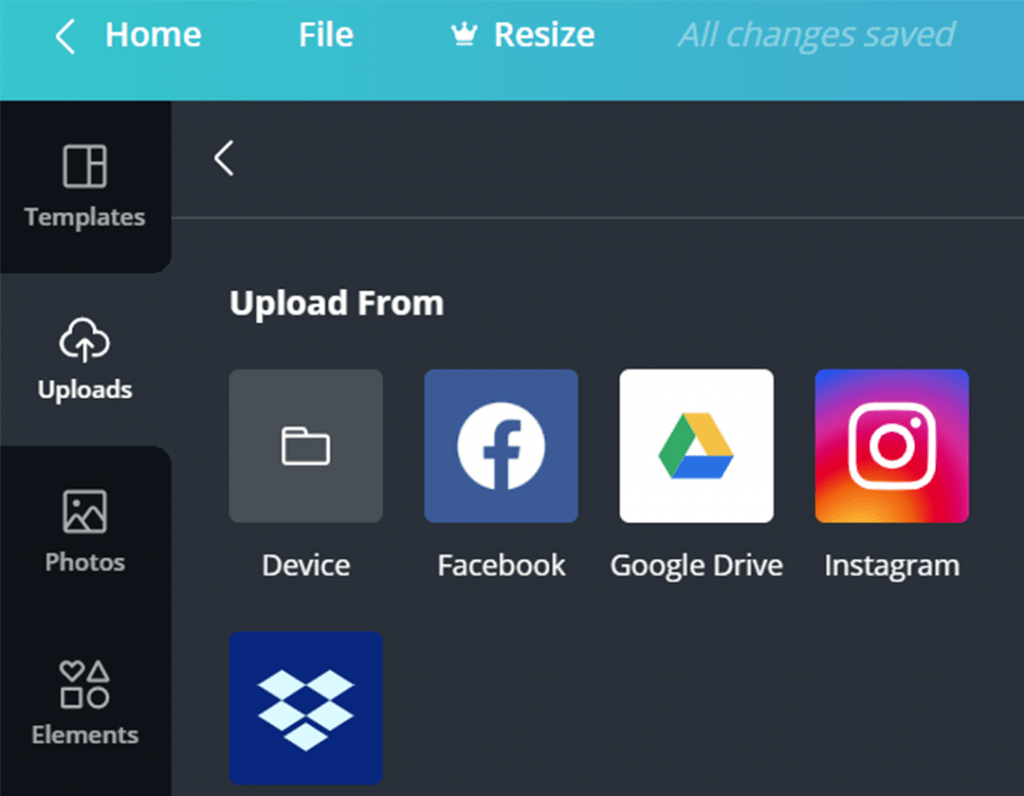
- On the far left side of your screen, there is equally vertical sidebar with options to choose the image you wish to resize. Select "Uploads," which should be the second icon from the peak.
- In the "Upload From" menu, select "Device." You will and then be able to select images from your estimator folder.
- Once your prototype has been uploaded to Canva, it will announced on the left side of your screen. Elevate and drop your epitome onto the blank canvass. Hitting "Enter" on your keyboard to place the paradigm on the canvass.
- Afterward your image has been placed on the canvas, double-click on it to enable the image reposition/resize tool.
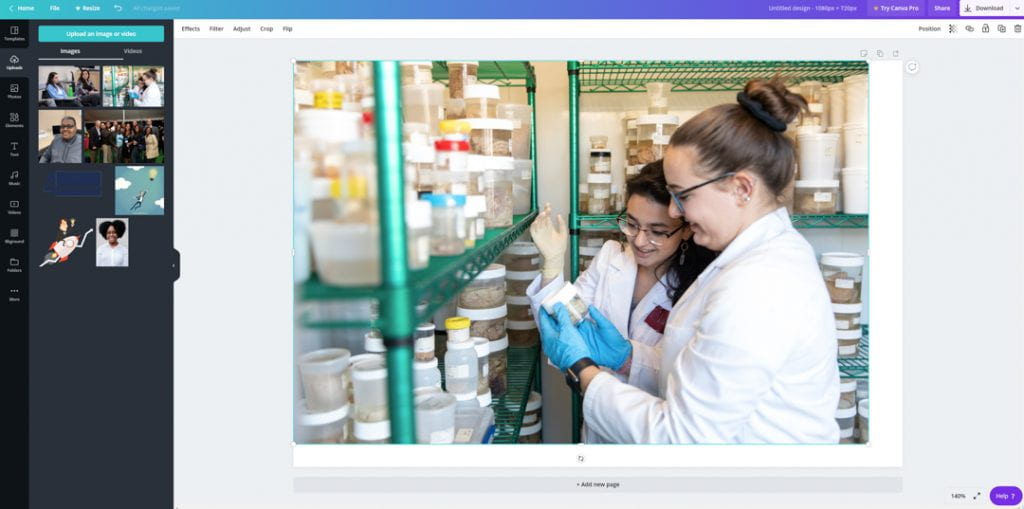
- Motility the paradigm with your mouse cursor to reposition it, or drag the corner to aggrandize/collapse the image.
- As you reposition and resize your image, make sure that the prototype covers the unabridged canvas.
- Additionally, you should bank check to make sure the image is well-positioned within the canvas and no important part of the image is cut off. For instance, if the image is a headshot, make certain part of the head is not cut off.
- Once your epitome has been properly sized and cropped, click "Download" at the top right corner. Select "File type" as "JPG," leave "Size" as-is and drag the "Quality" scale to 80 percent. This will reduce the file size of your prototype.
- Click the "Download" button. The image file will be downloaded to your computer.
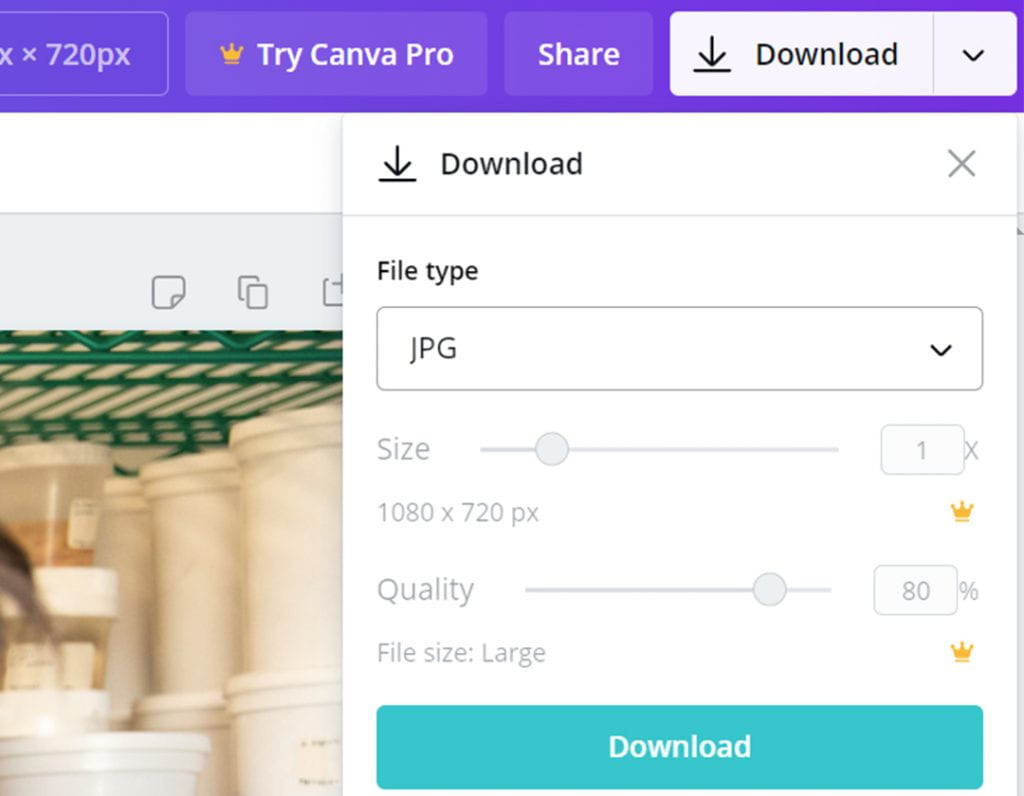
- Your downloaded prototype should now be properly resized and meet our spider web sizing standards. Use this paradigm on your Drupal website.
Source: https://communications.columbian.gwu.edu/resources/headshots-image-sizing-resources/
0 Response to "How to Upload Bodyshot Headshot Photo Meeting Hiring Website Requirements"
Post a Comment